Philadelphia Airport (PHL) | Maps
Zoom In
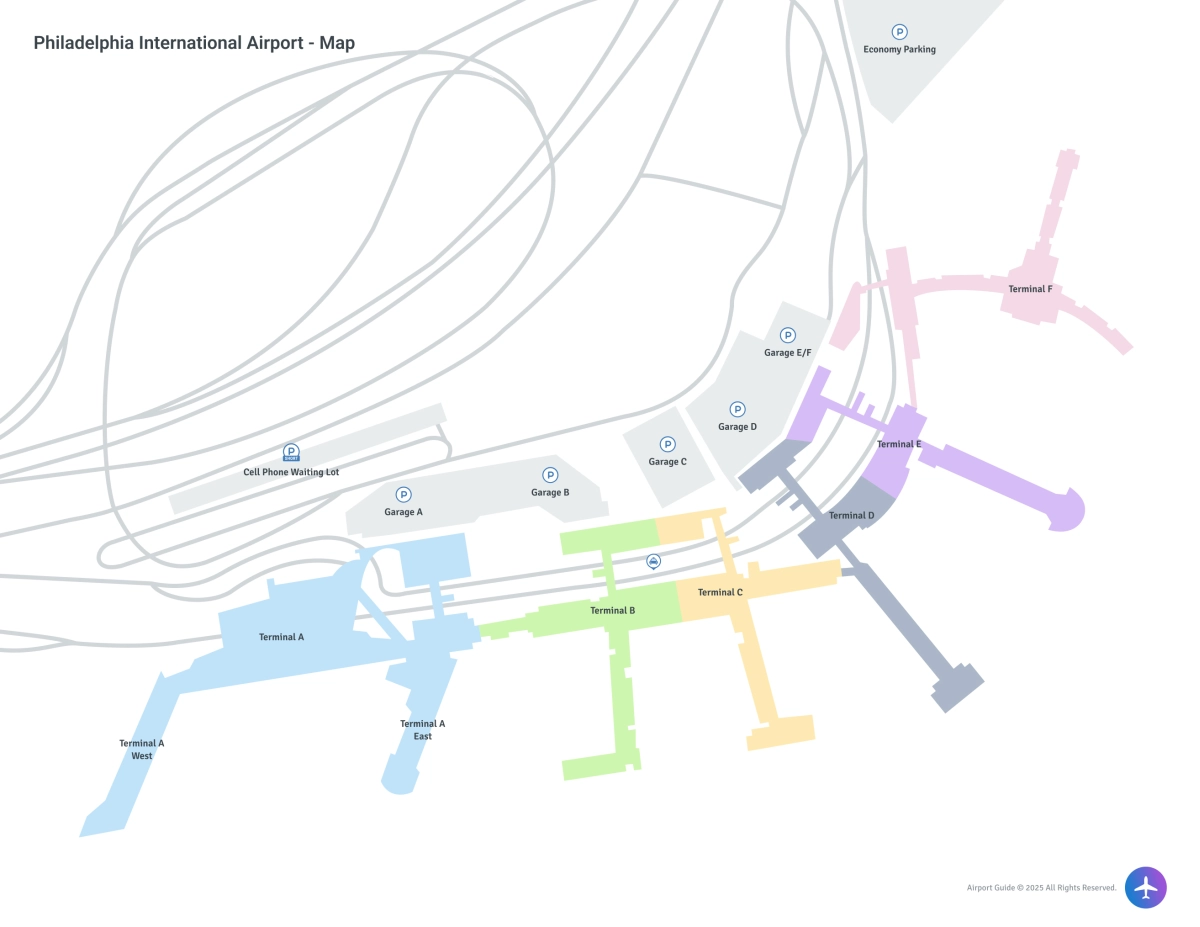
Terminal Interactive Maps
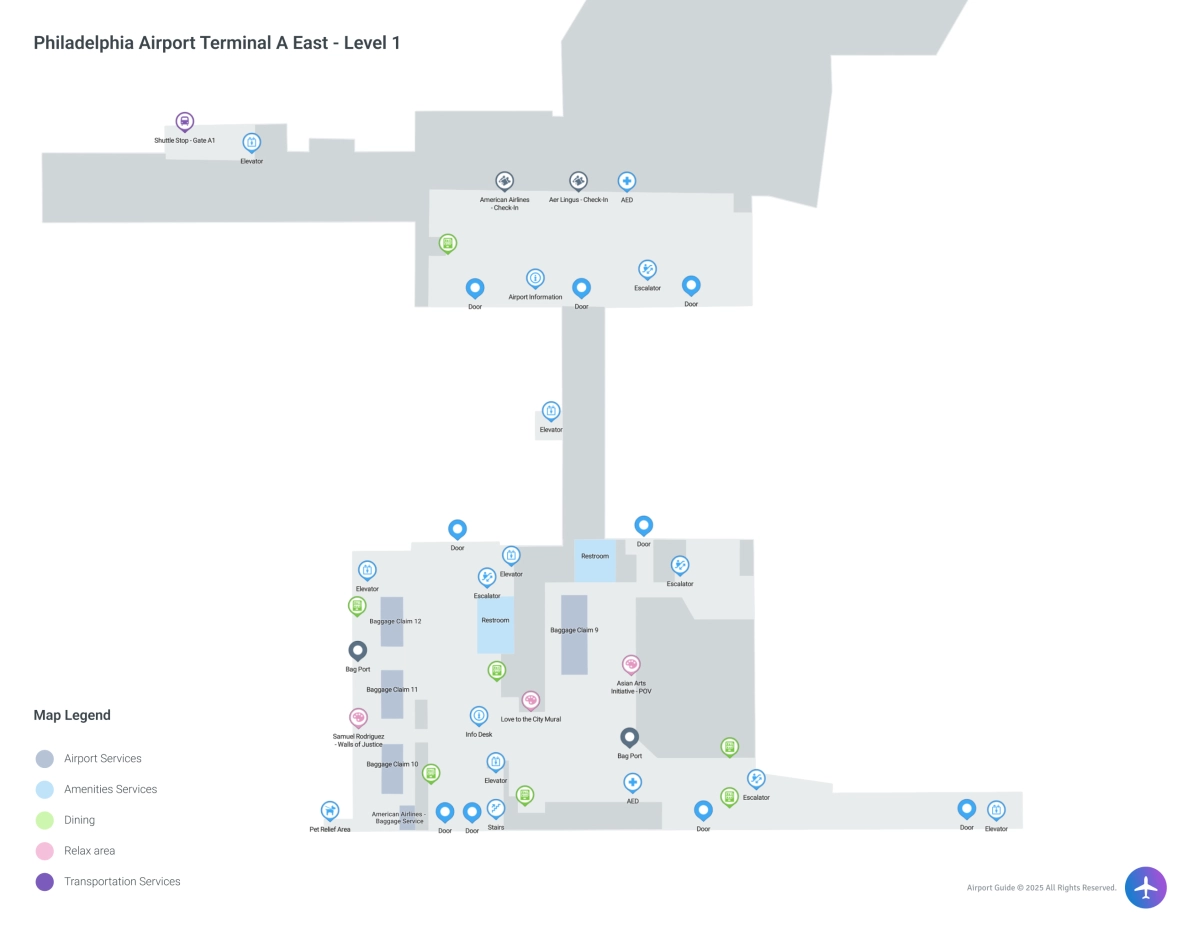
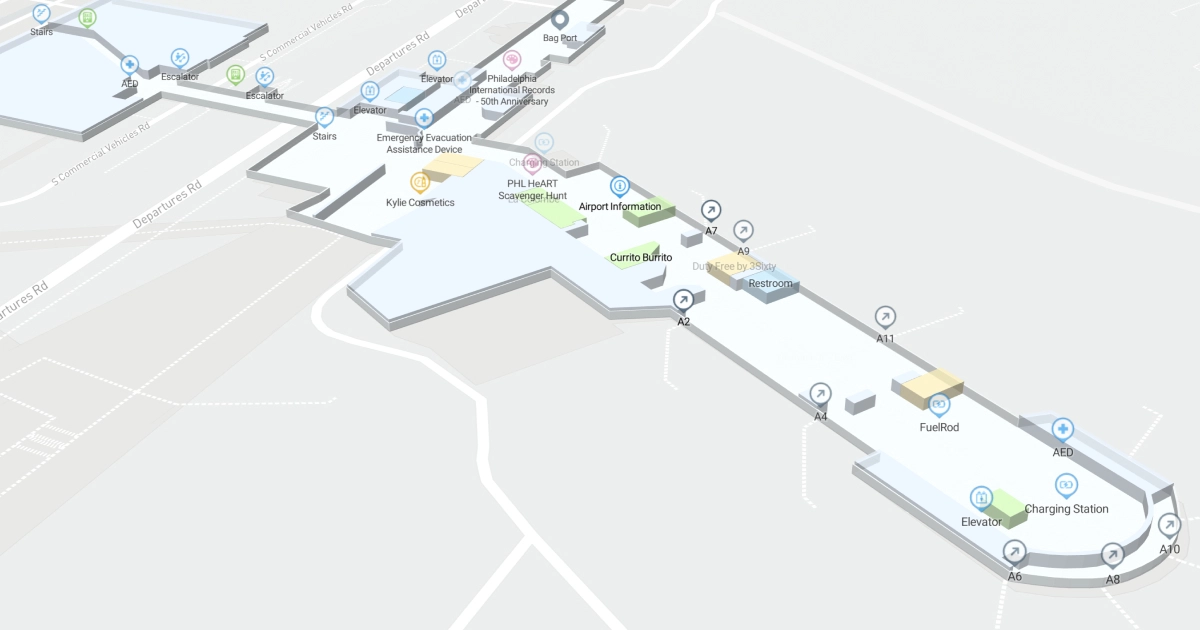
PHL | Terminal A East | Level 1 | Interactive map
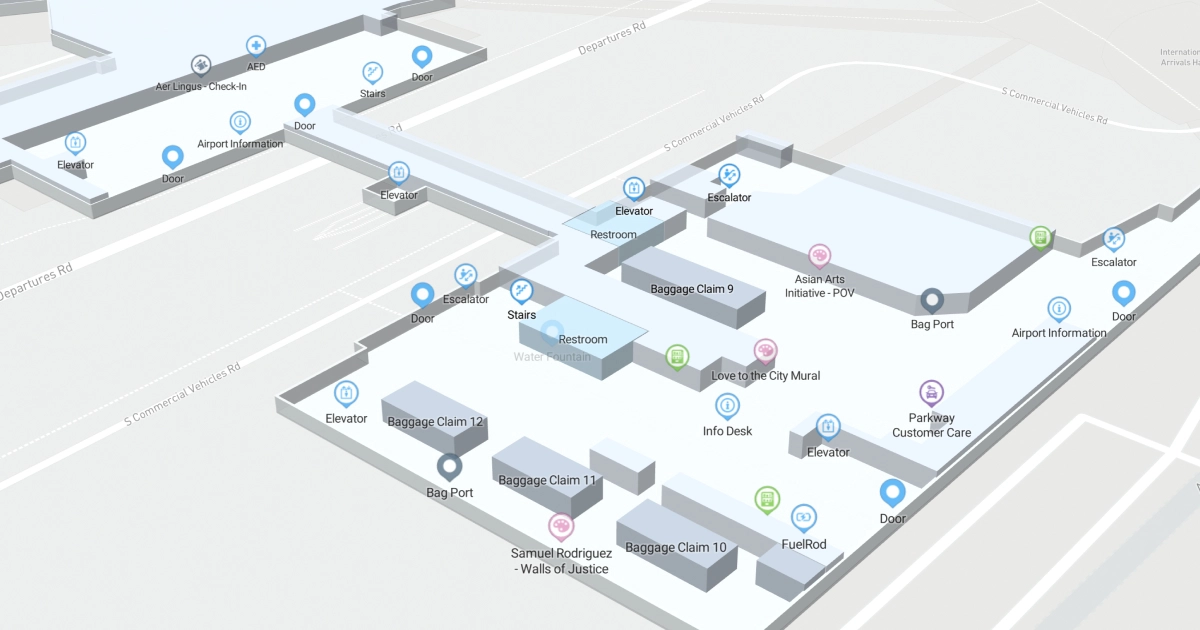
PHL | Terminal A East | Level 1 | Printable map
Zoom In
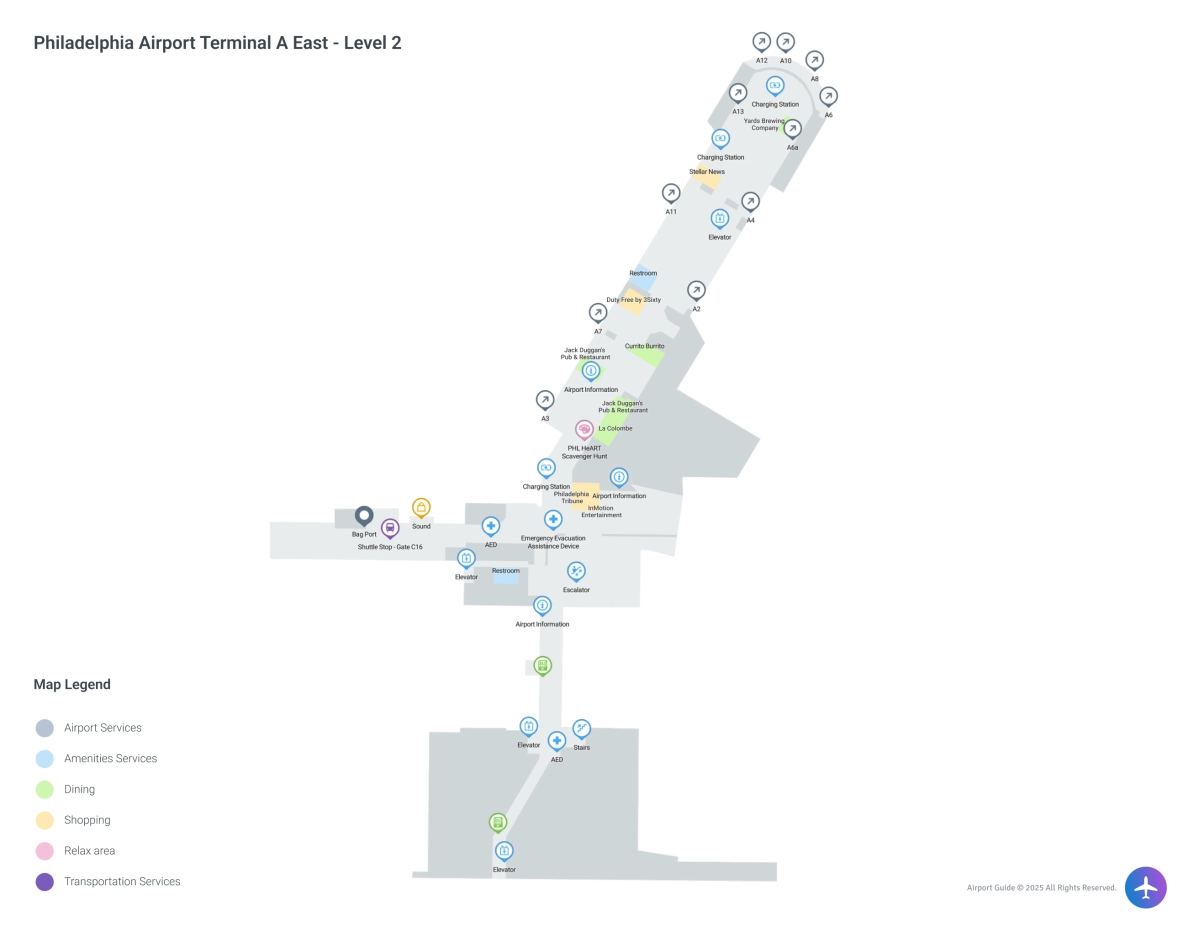
PHL | Terminal A East | Level 2 | Interactive map
PHL | Terminal A East | Level 2 | Printable map
Zoom In
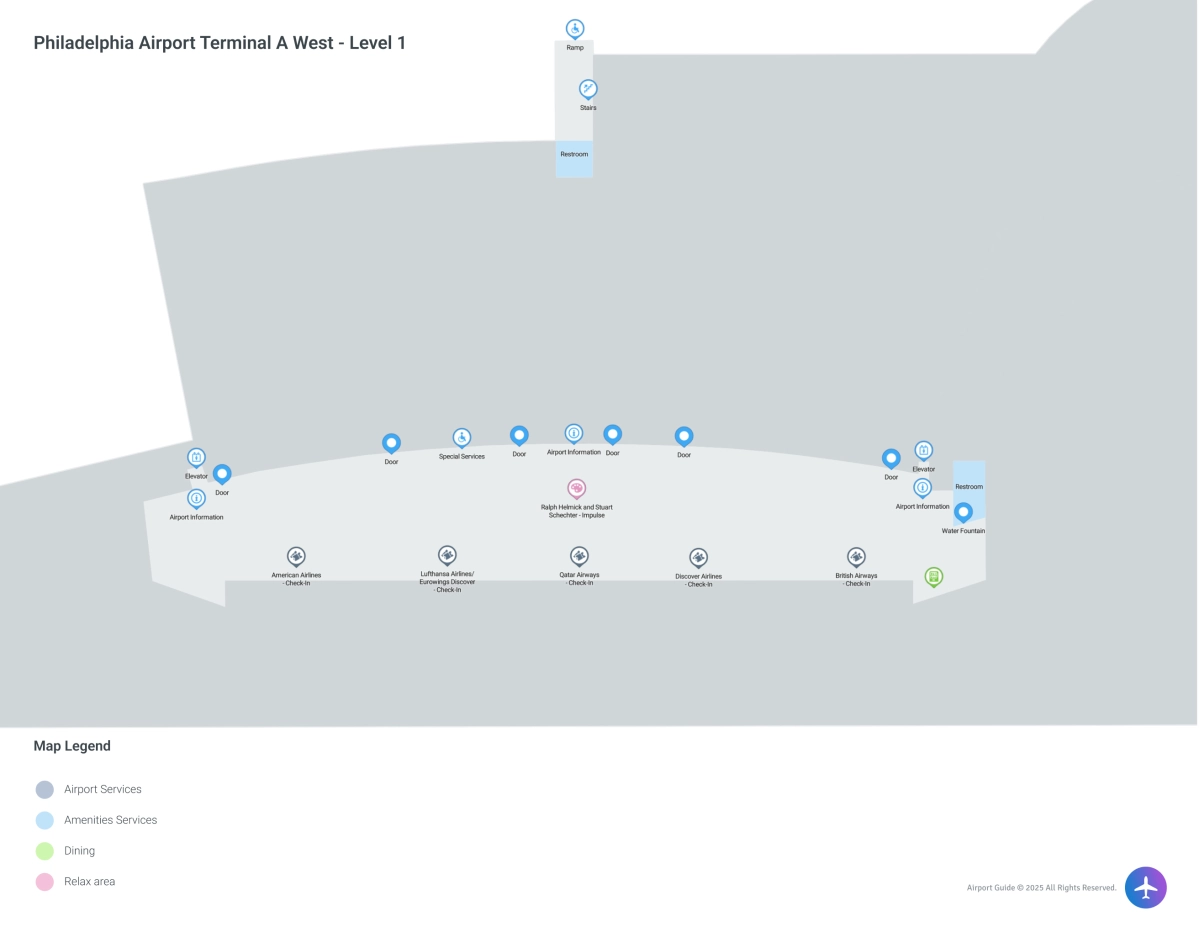
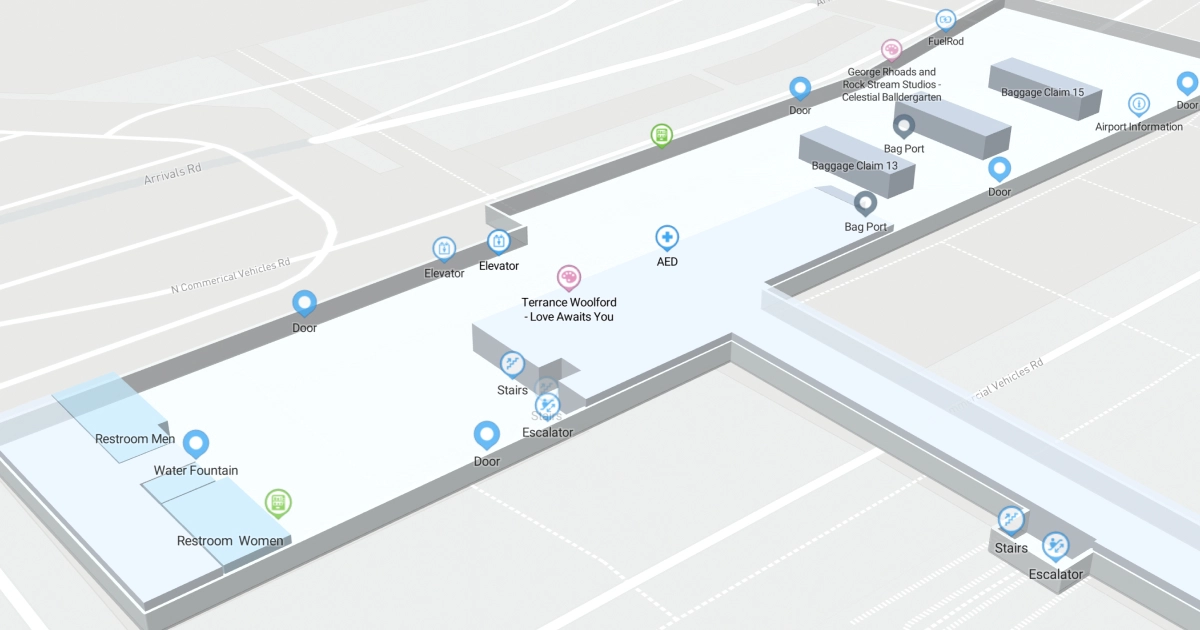
PHL | Terminal A West | Level 1 | Interactive map
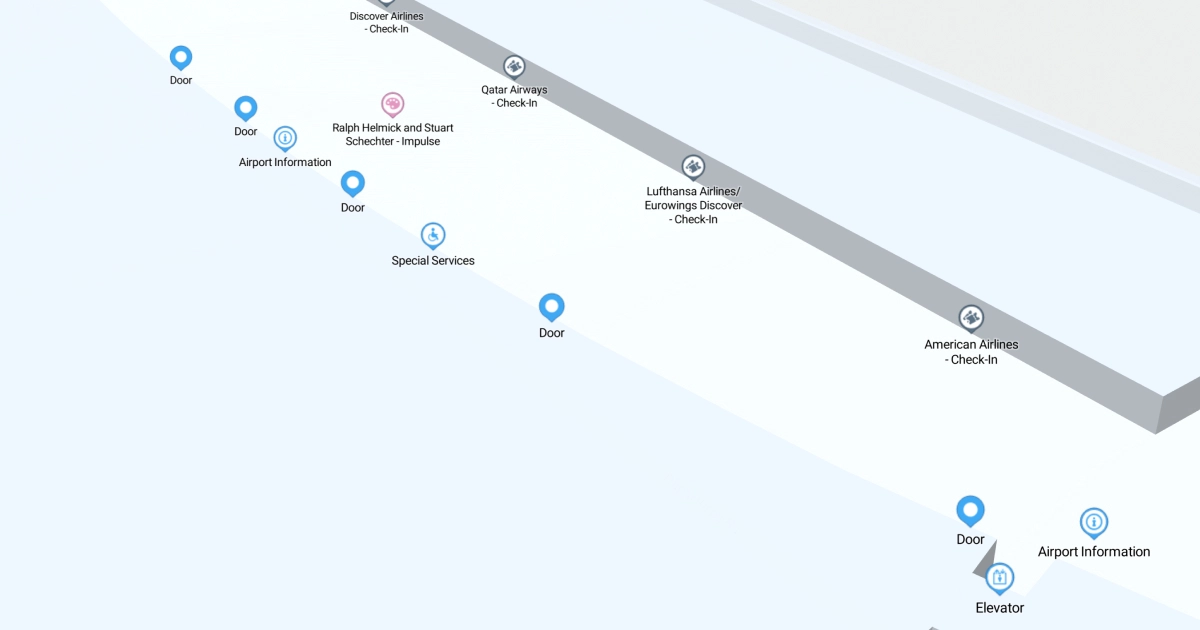
PHL | Terminal A West | Level 1 | Printable map
Zoom In
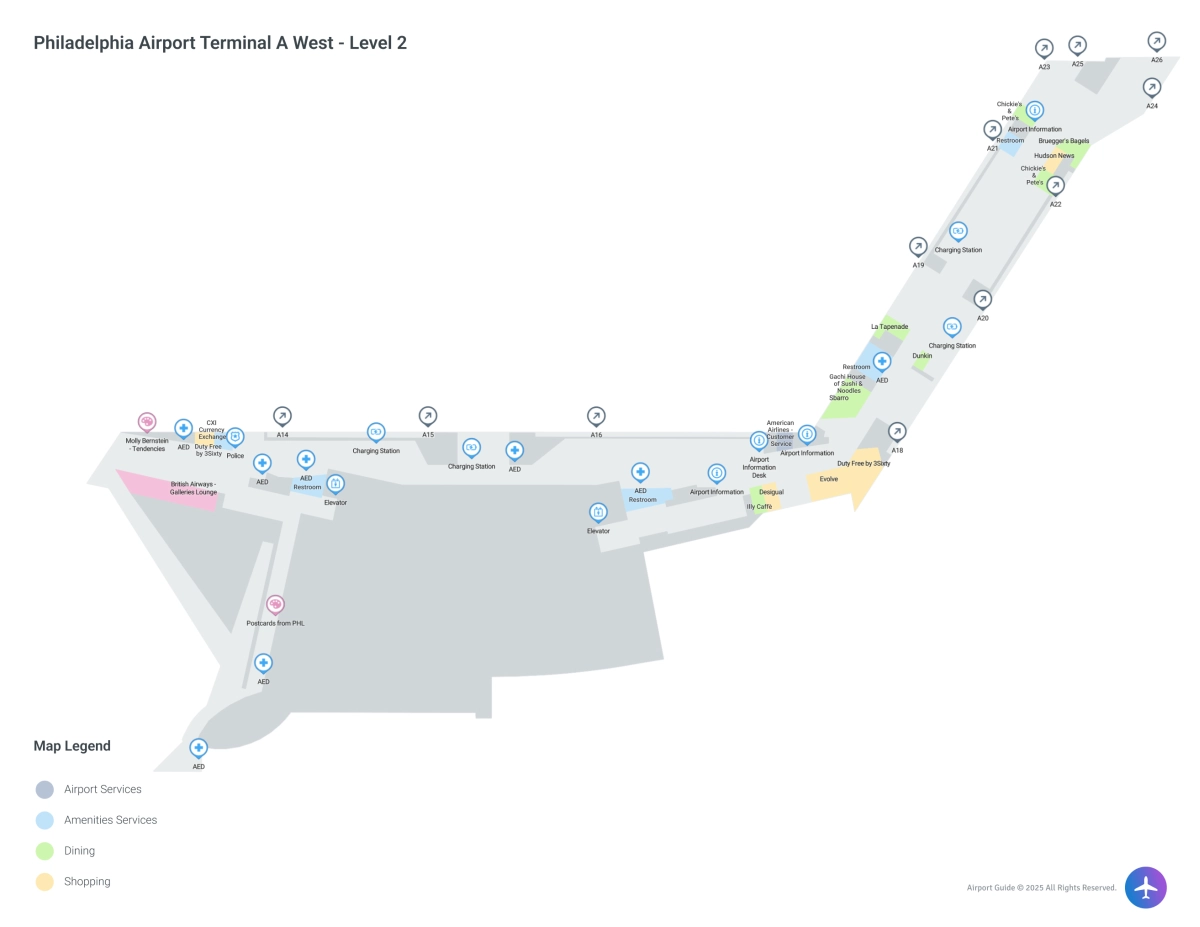
PHL | Terminal A West | Level 2 | Interactive map
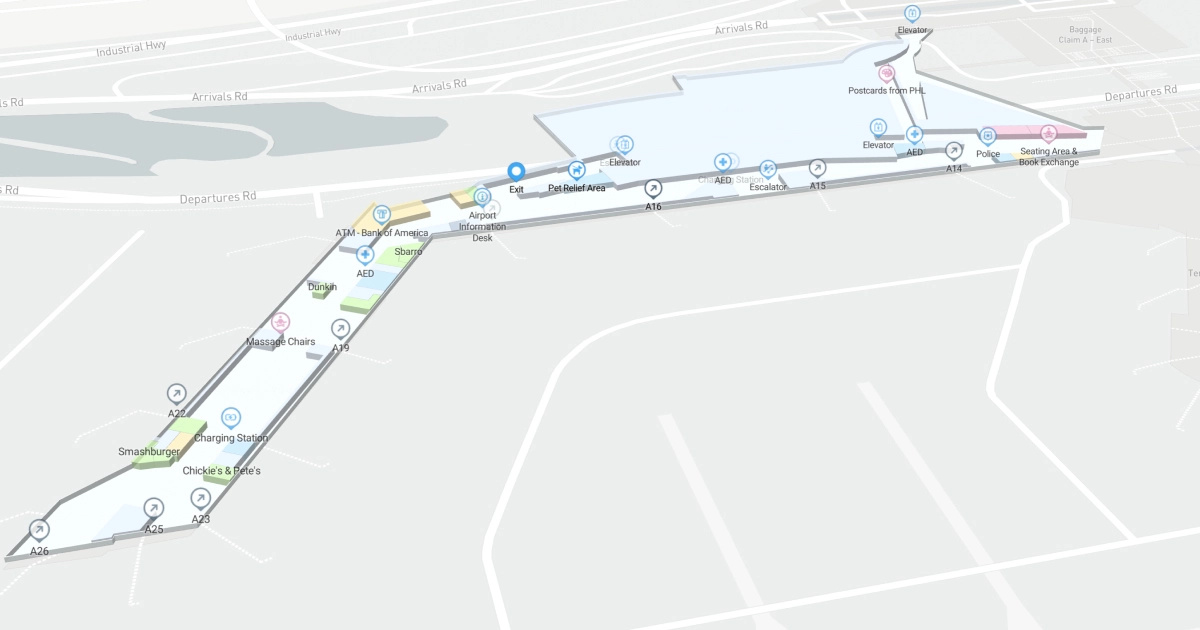
PHL | Terminal A West | Level 2 | Printable map
Zoom In
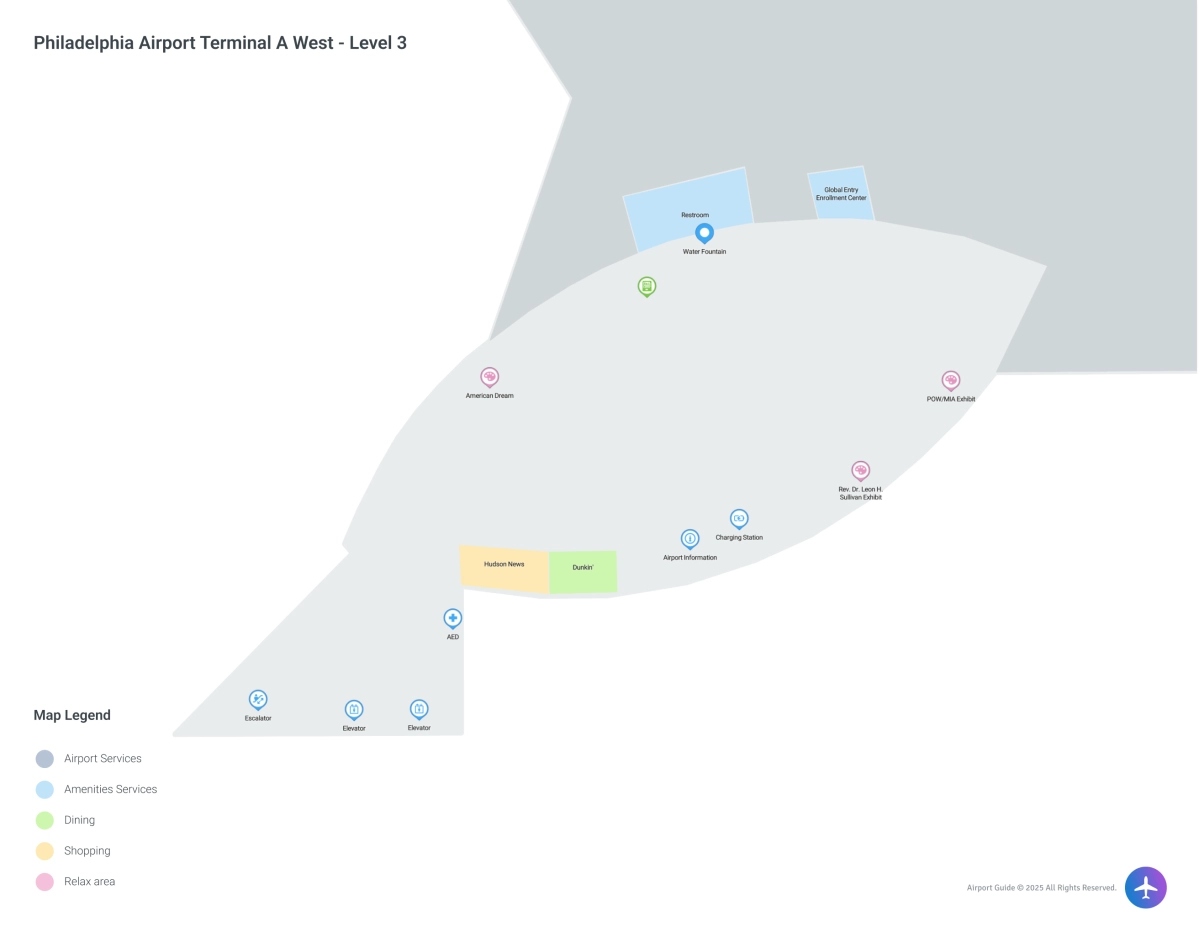
PHL | Terminal A West | Level 3 | Interactive map
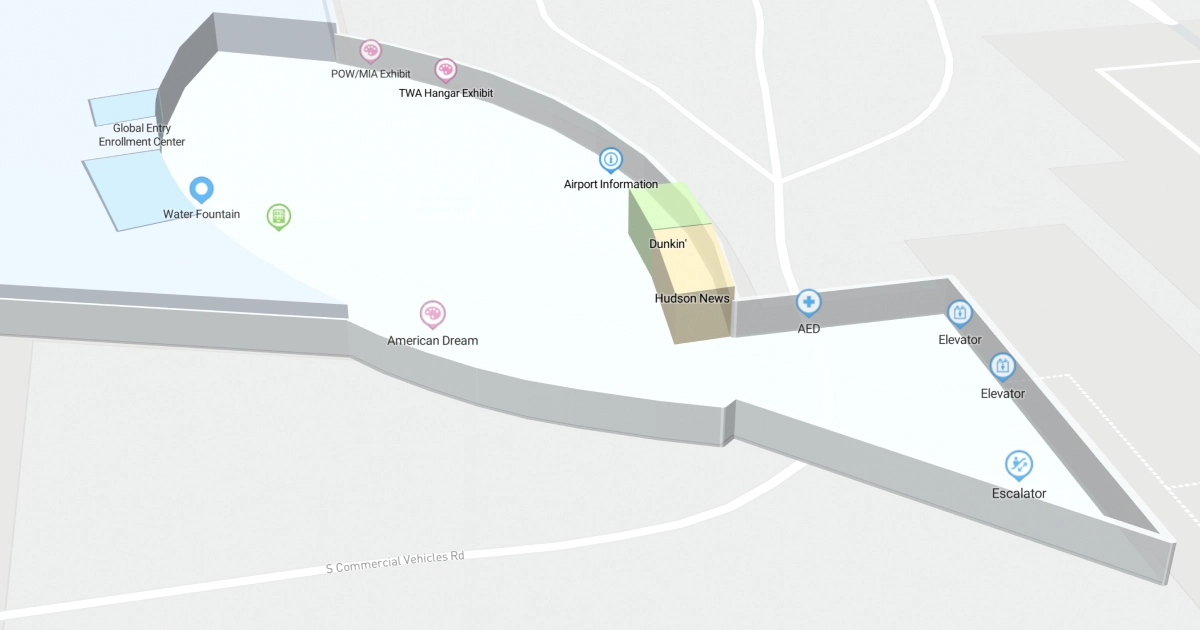
PHL | Terminal A West | Level 3 | Printable map
Zoom In
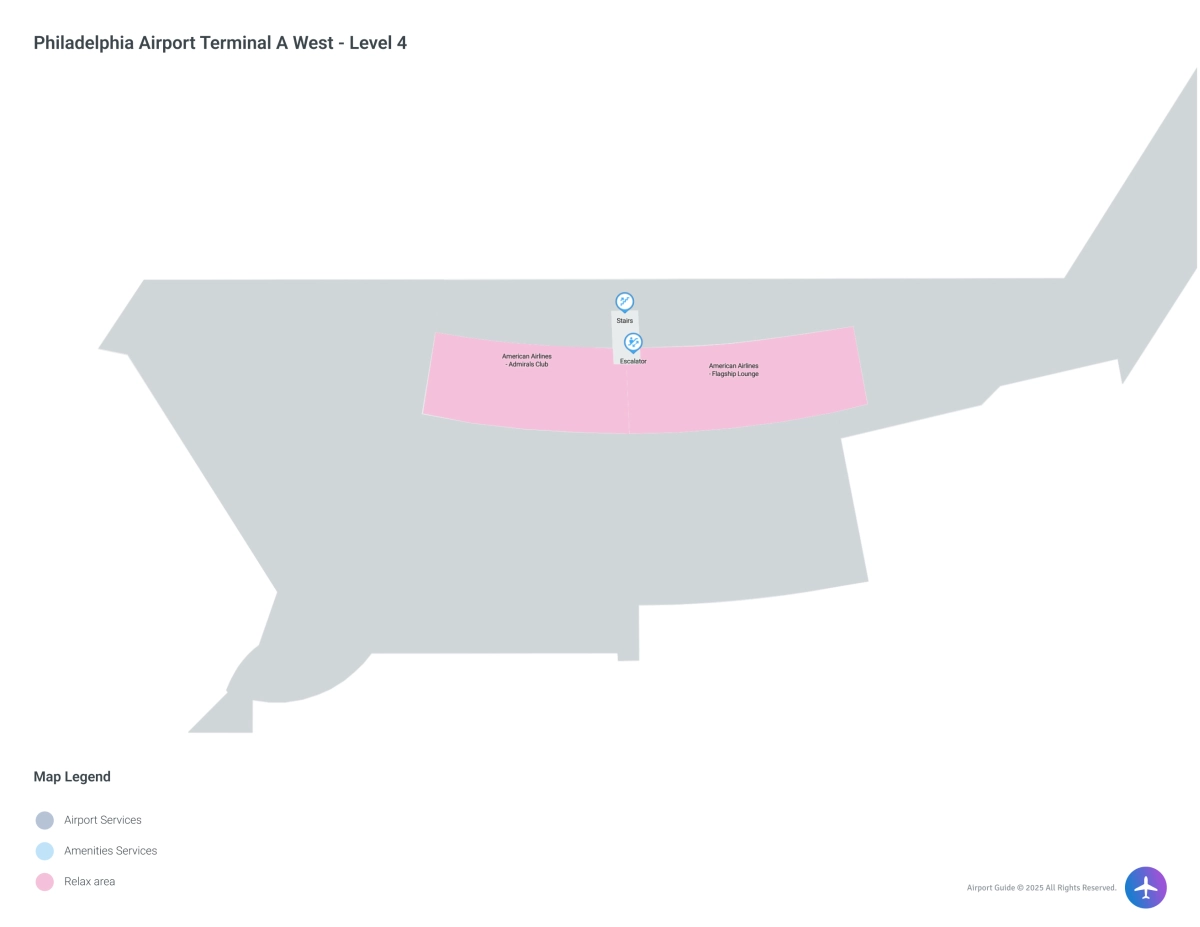
PHL | Terminal A West | Level 4 | Interactive map
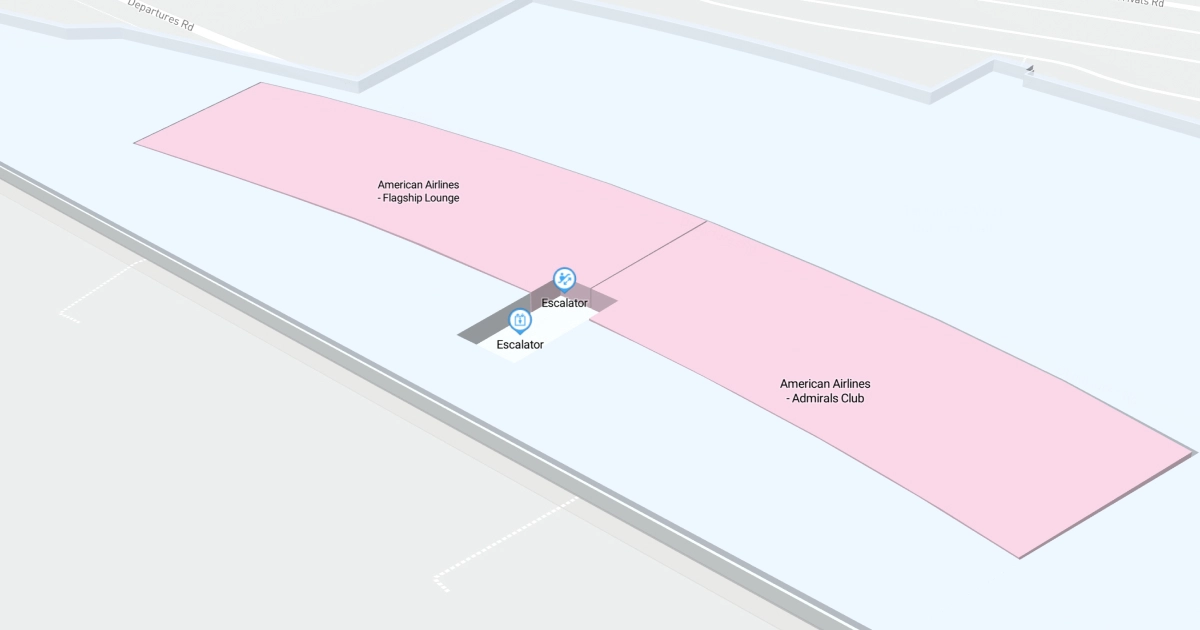
PHL | Terminal A West | Level 4 | Printable map
Zoom In
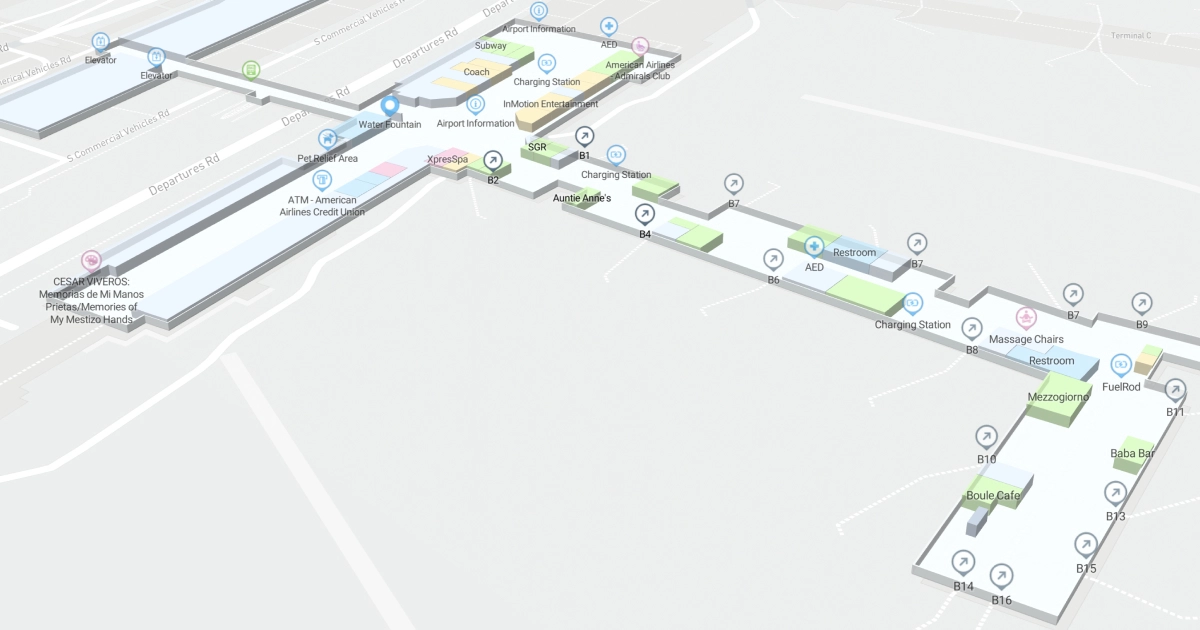
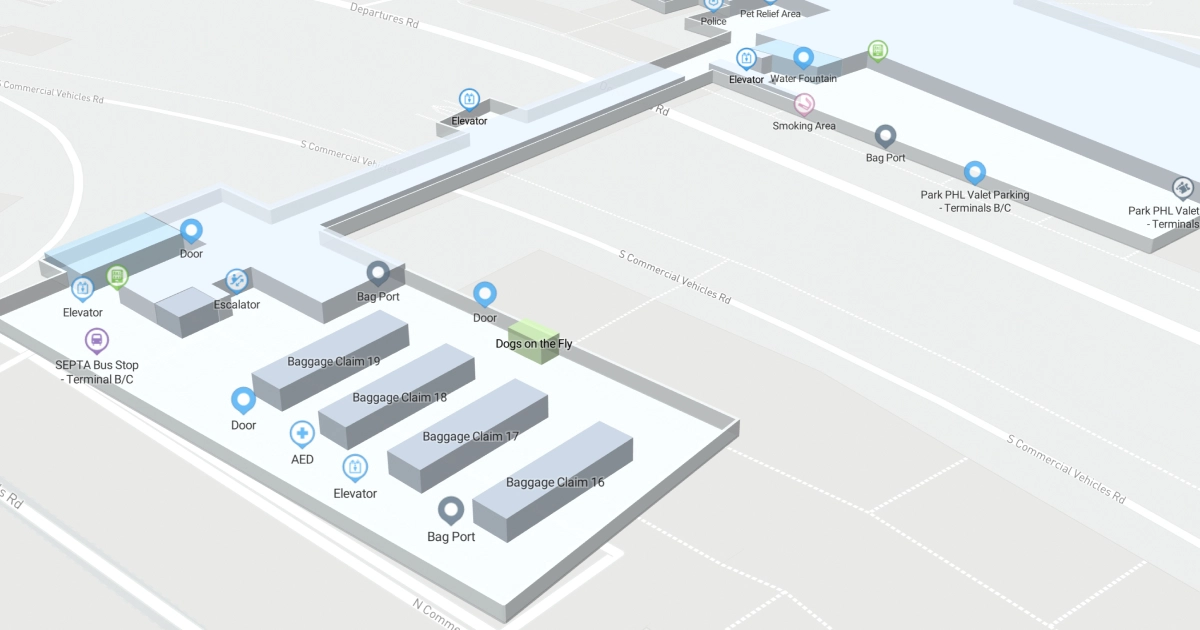
PHL | Terminal B | Level 1 | Interactive map
PHL | Terminal B | Level 1 | Printable map
Zoom In

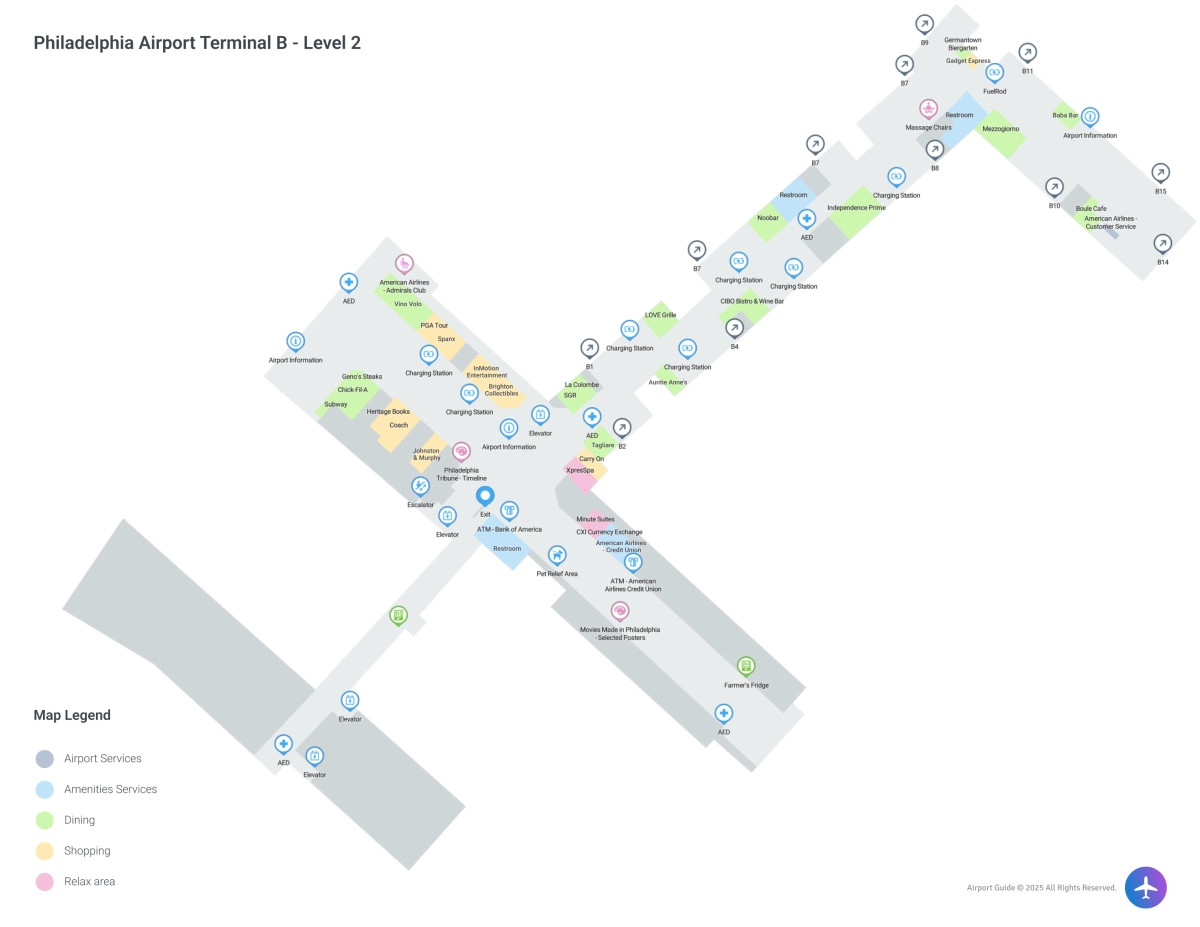
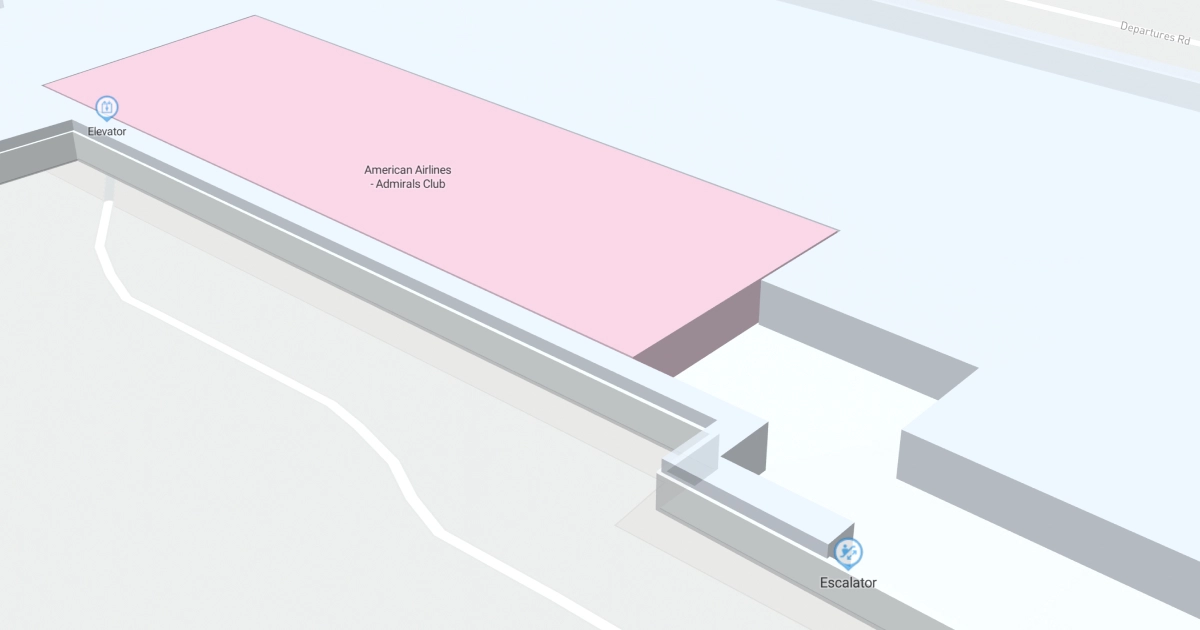
PHL | Terminal B | Level 2 | Interactive map
PHL | Terminal B | Level 2 | Printable map
Zoom In
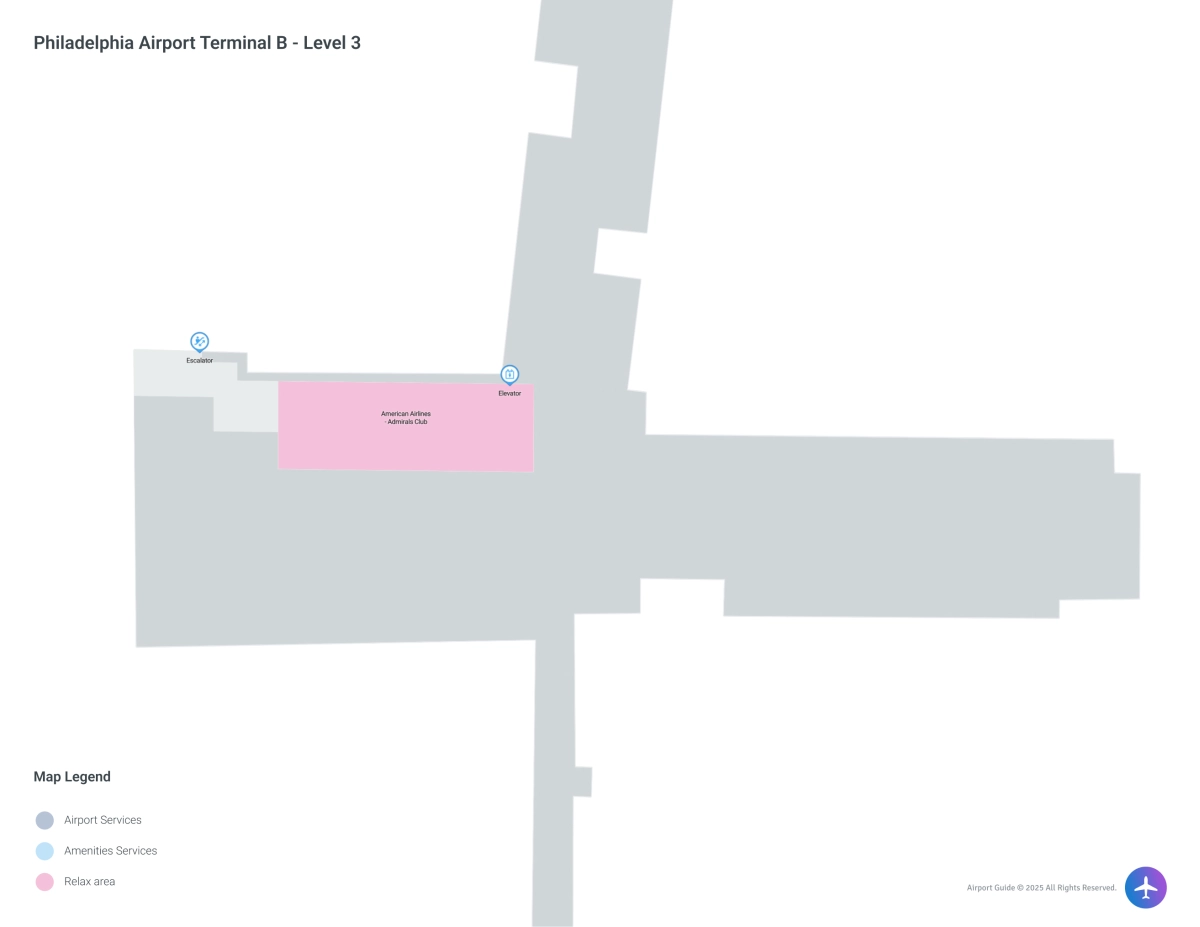
PHL | Terminal B | Level 3 | Interactive map
PHL | Terminal B | Level 3 | Printable map
Zoom In
PHL | Terminal C | Level 1 | Interactive map
PHL | Terminal C | Level 1 | Printable map
Zoom In

PHL | Terminal C | Level 2 | Interactive map
PHL | Terminal C | Level 2 | Printable map
Zoom In

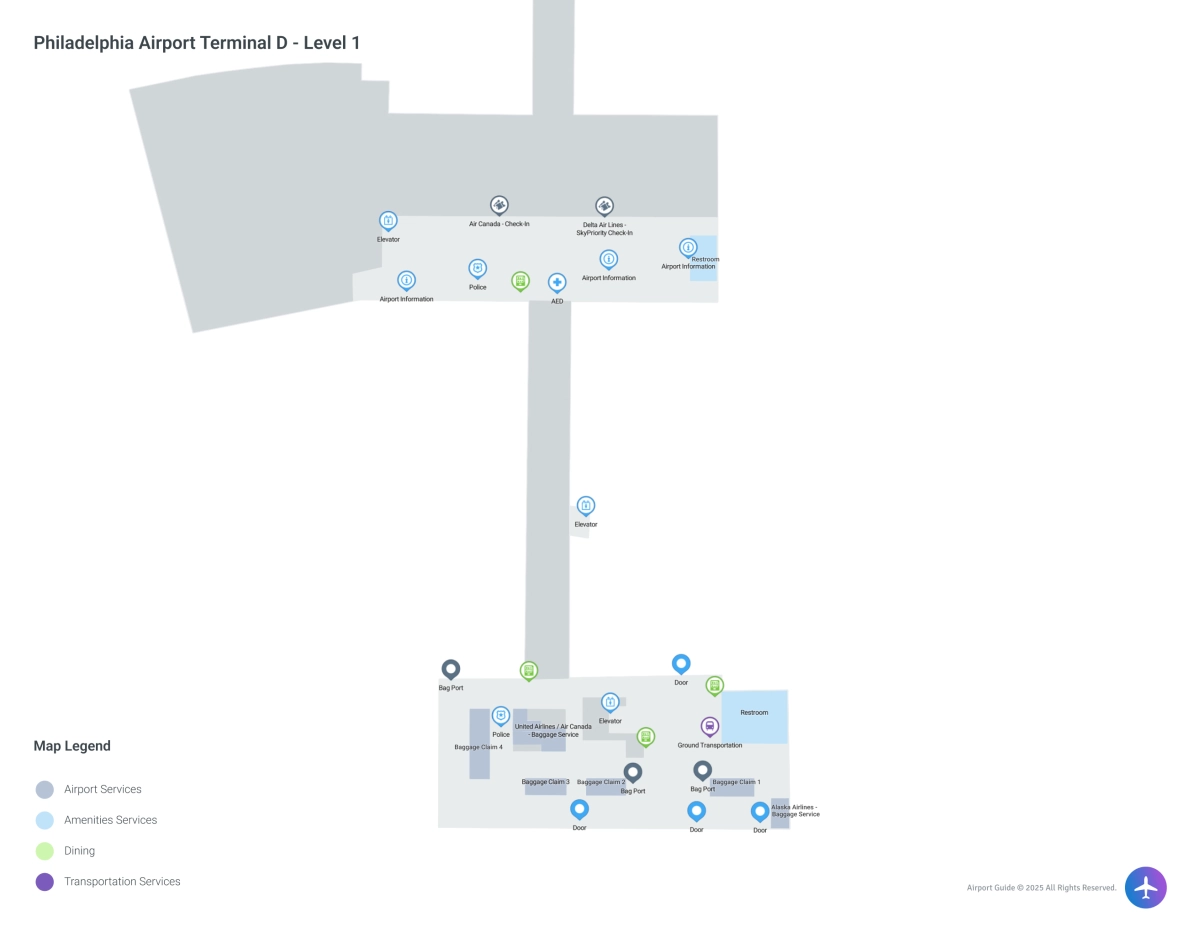
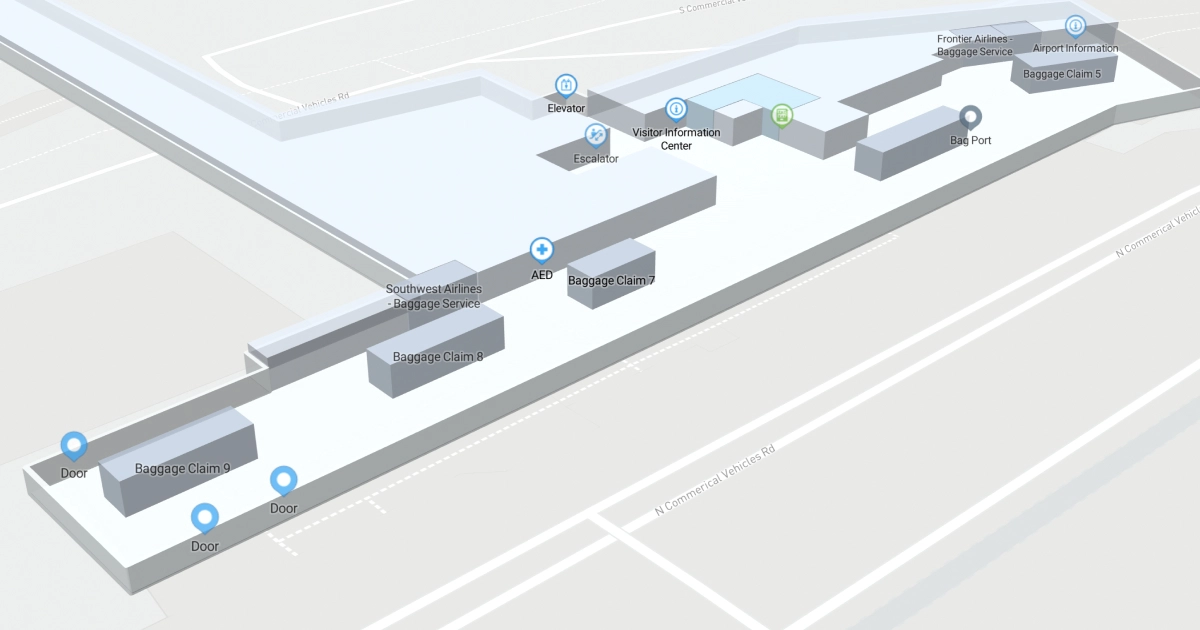
PHL | Terminal D | Level 1 | Interactive map
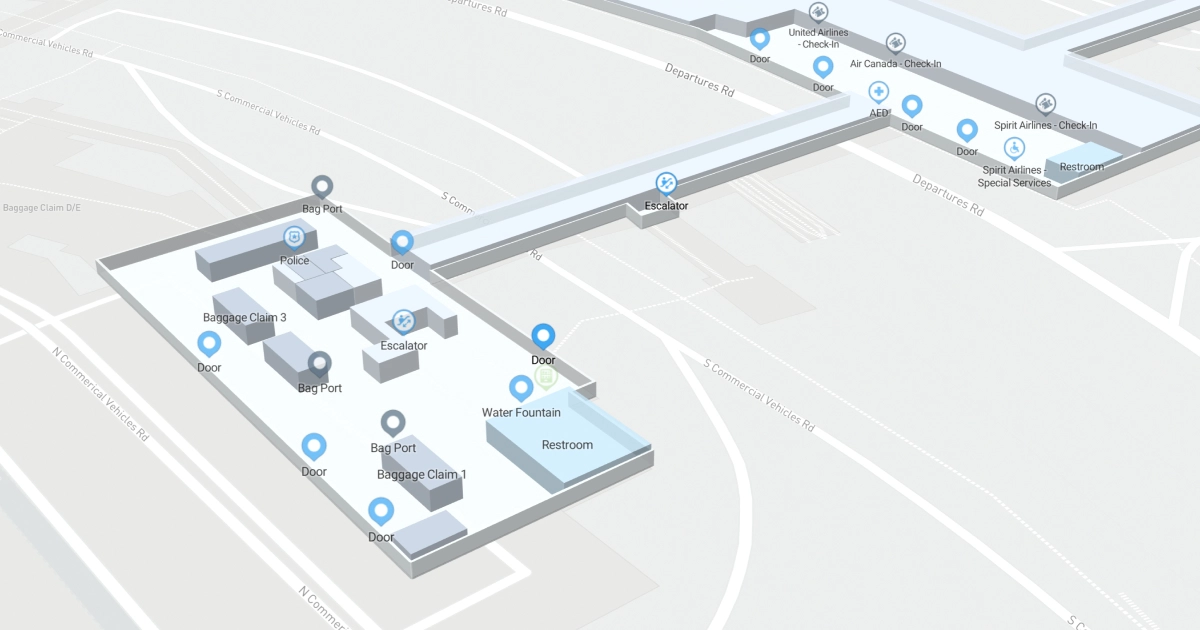
PHL | Terminal D | Level 1 | Printable map
Zoom In
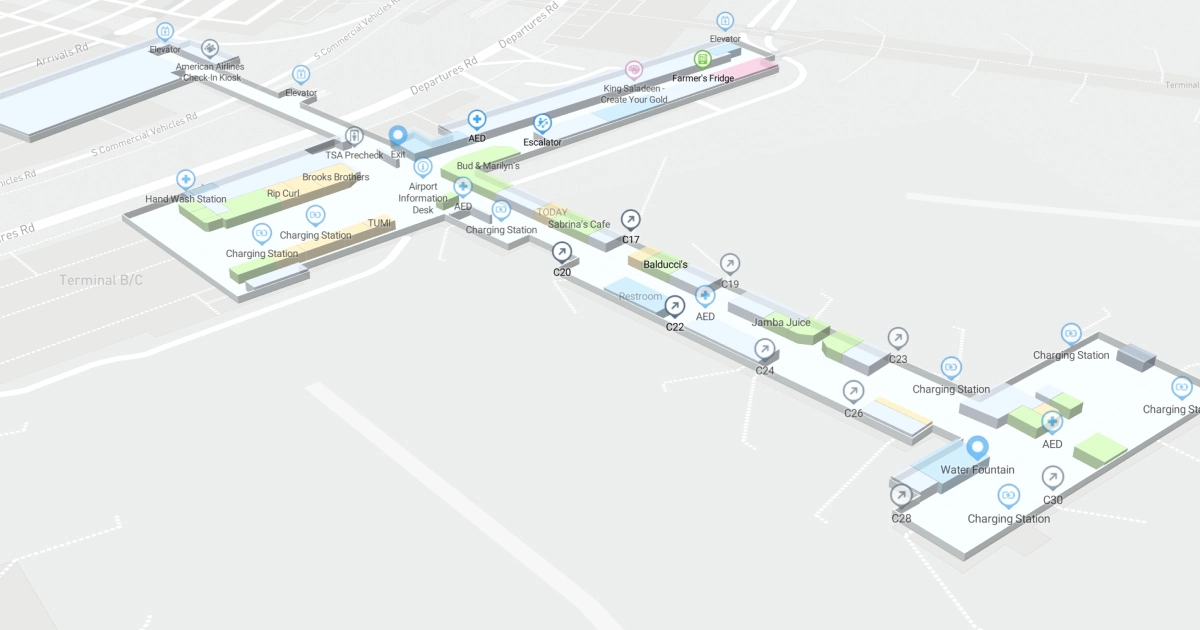
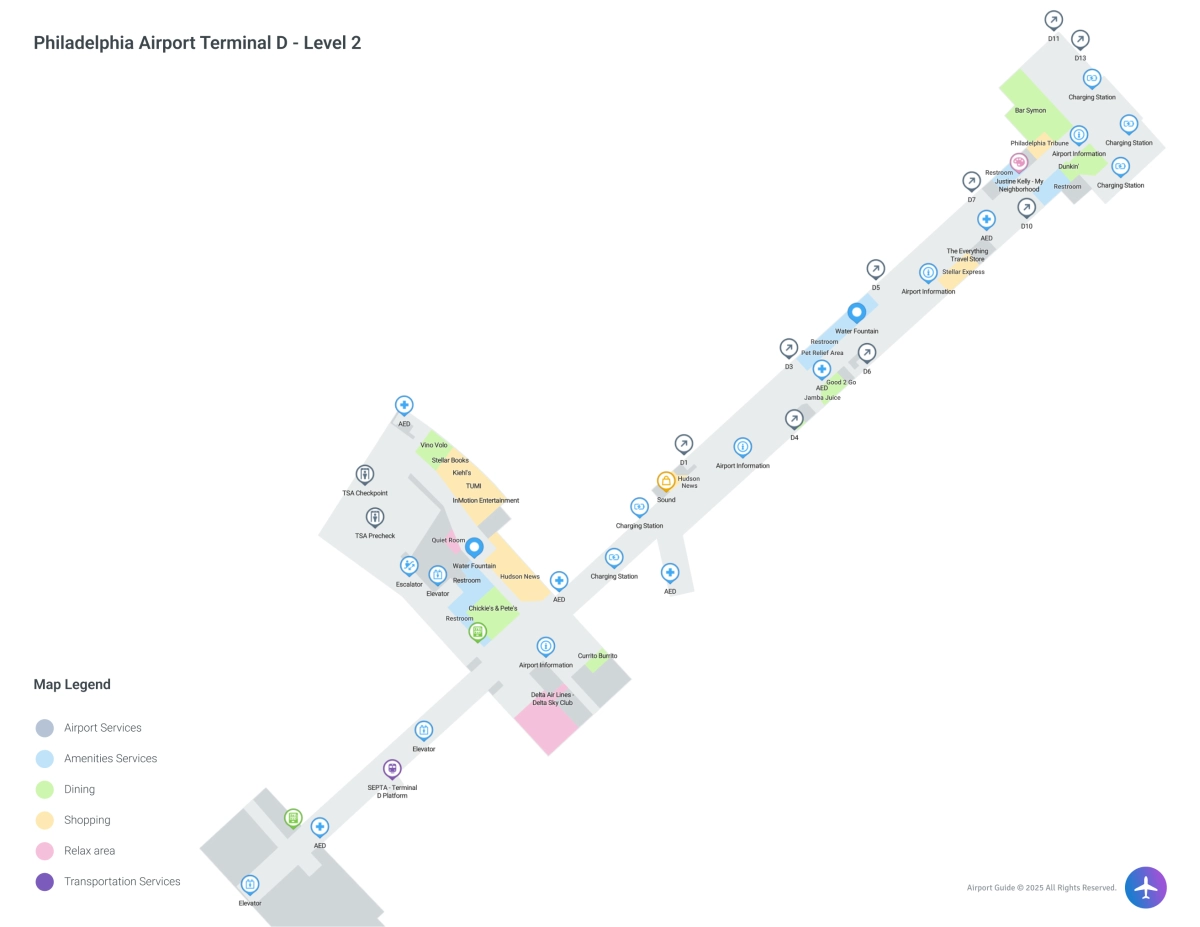
PHL | Terminal D | Level 2 | Interactive map
PHL | Terminal D | Level 2 | Printable map
Zoom In
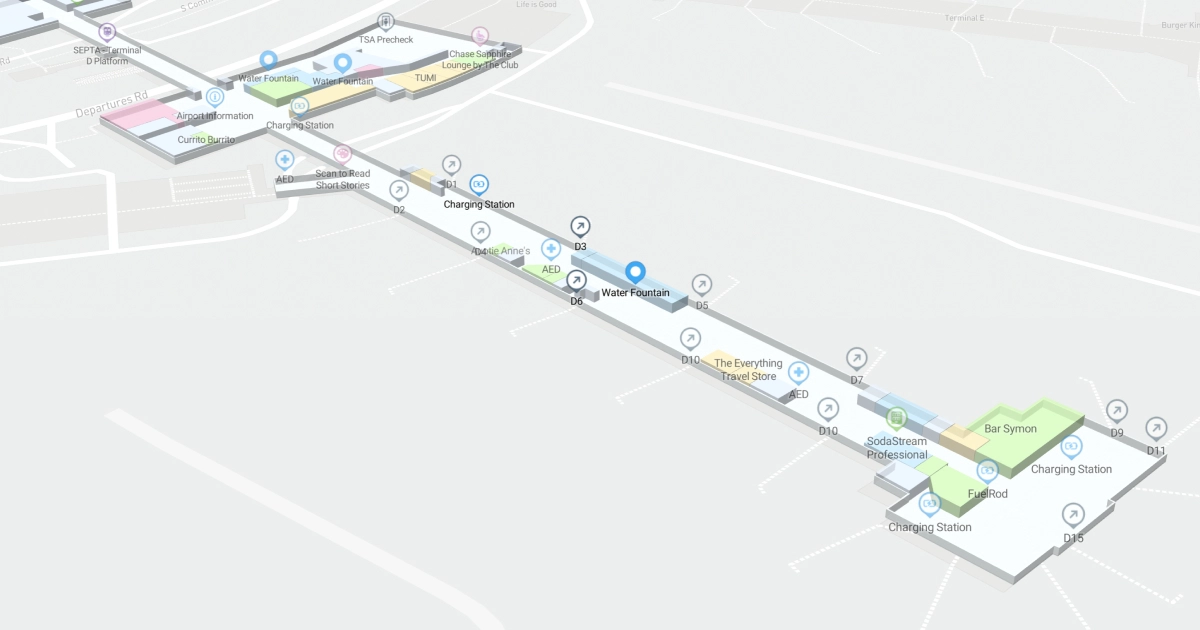
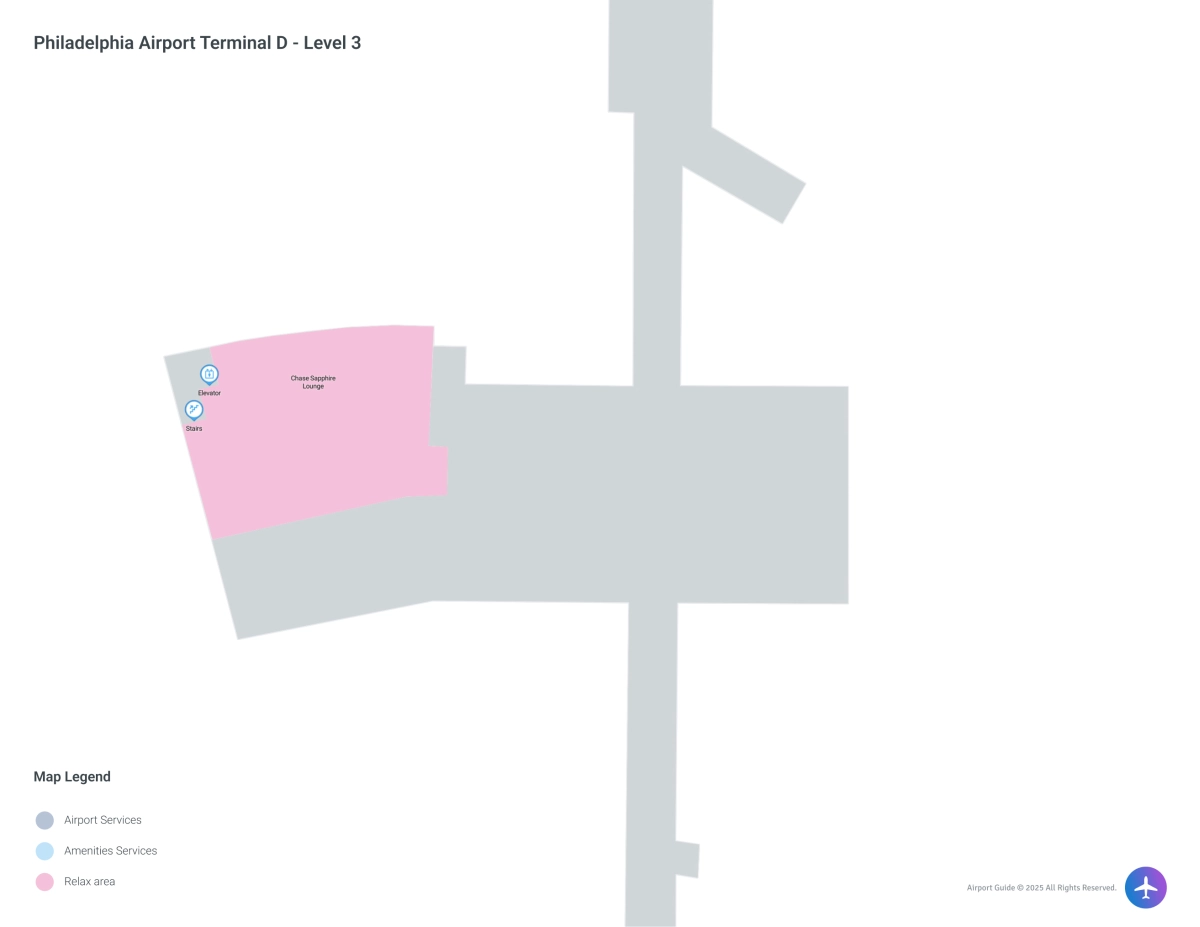
PHL | Terminal D | Level 3 | Interactive map
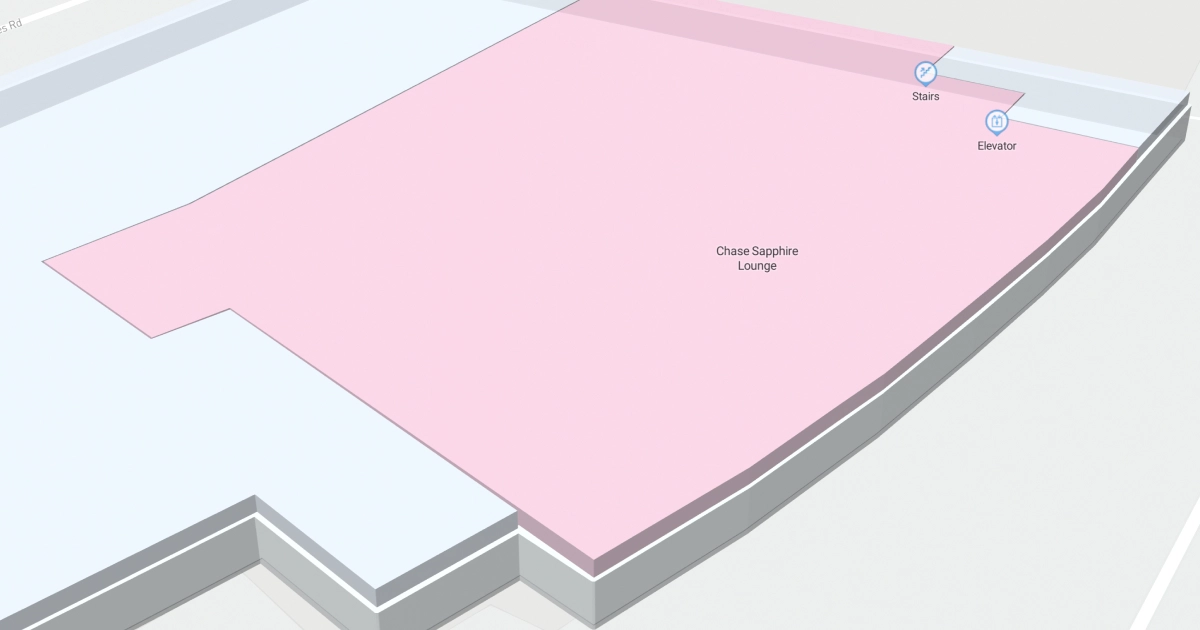
PHL | Terminal D | Level 3 | Printable map
Zoom In
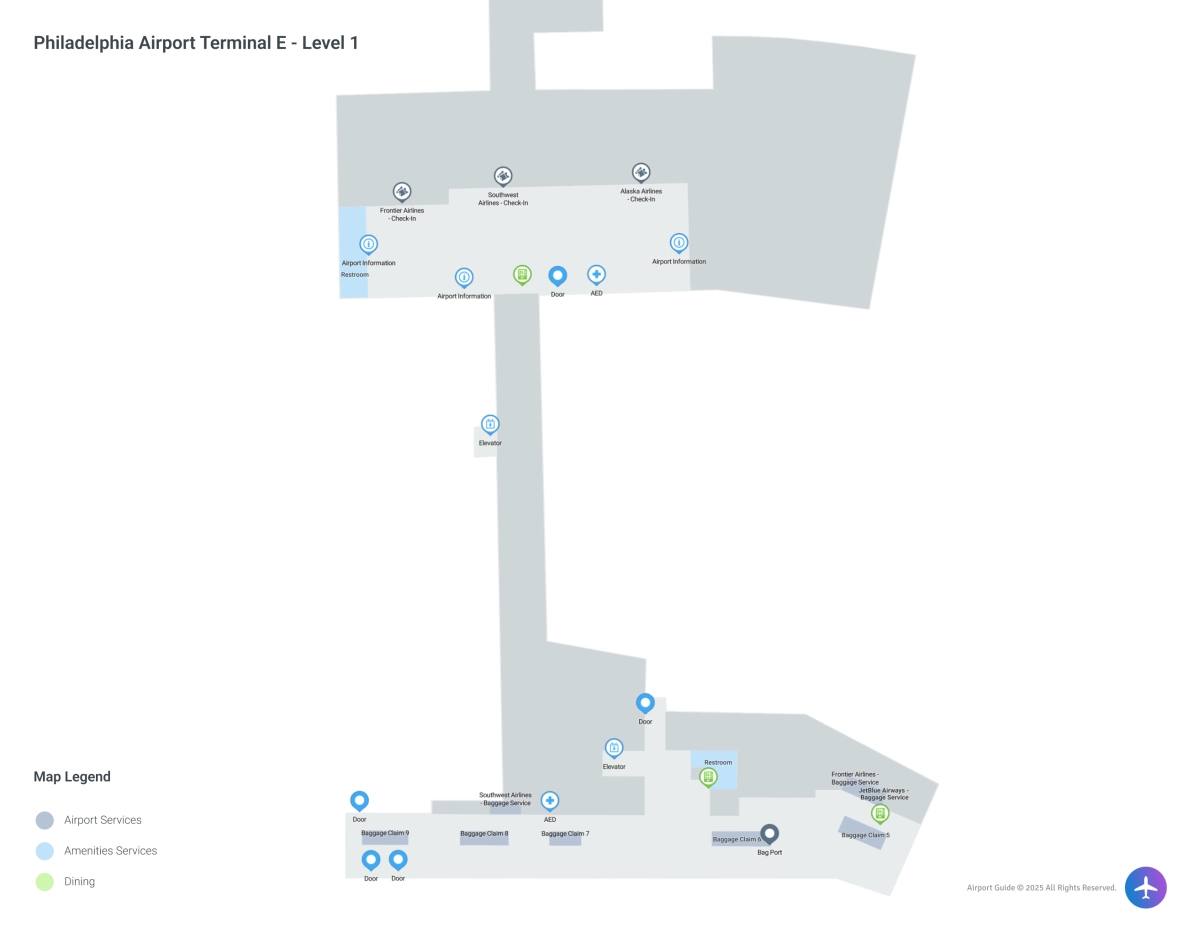
PHL | Terminal E | Level 1 | Interactive map
PHL | Terminal E | Level 1 | Printable map
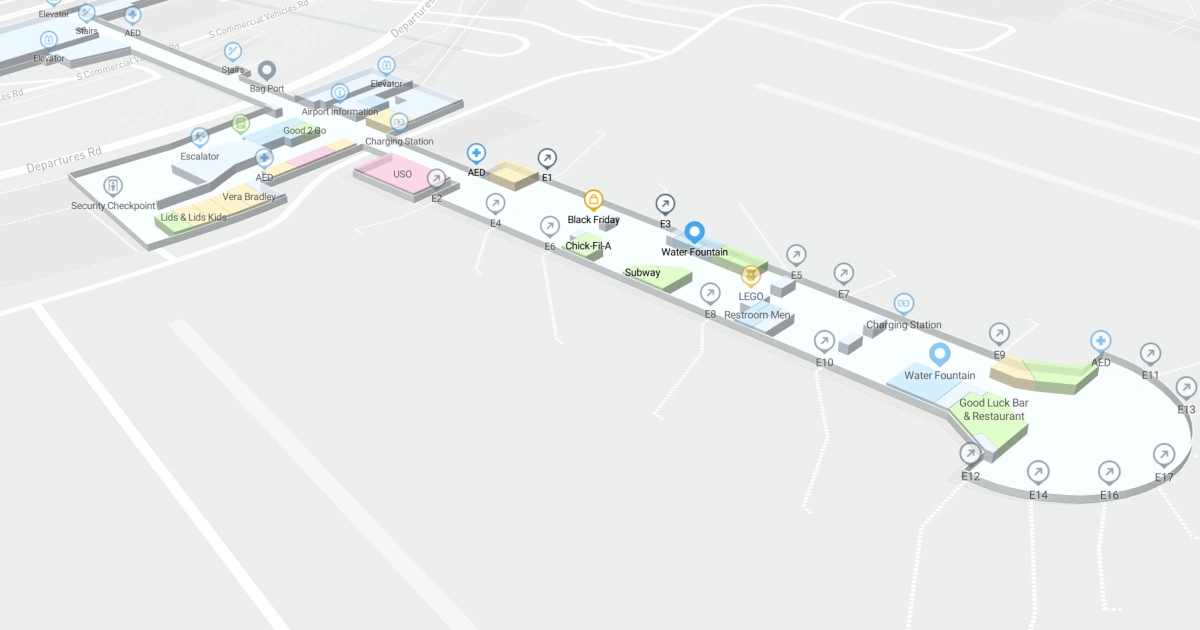
Zoom In
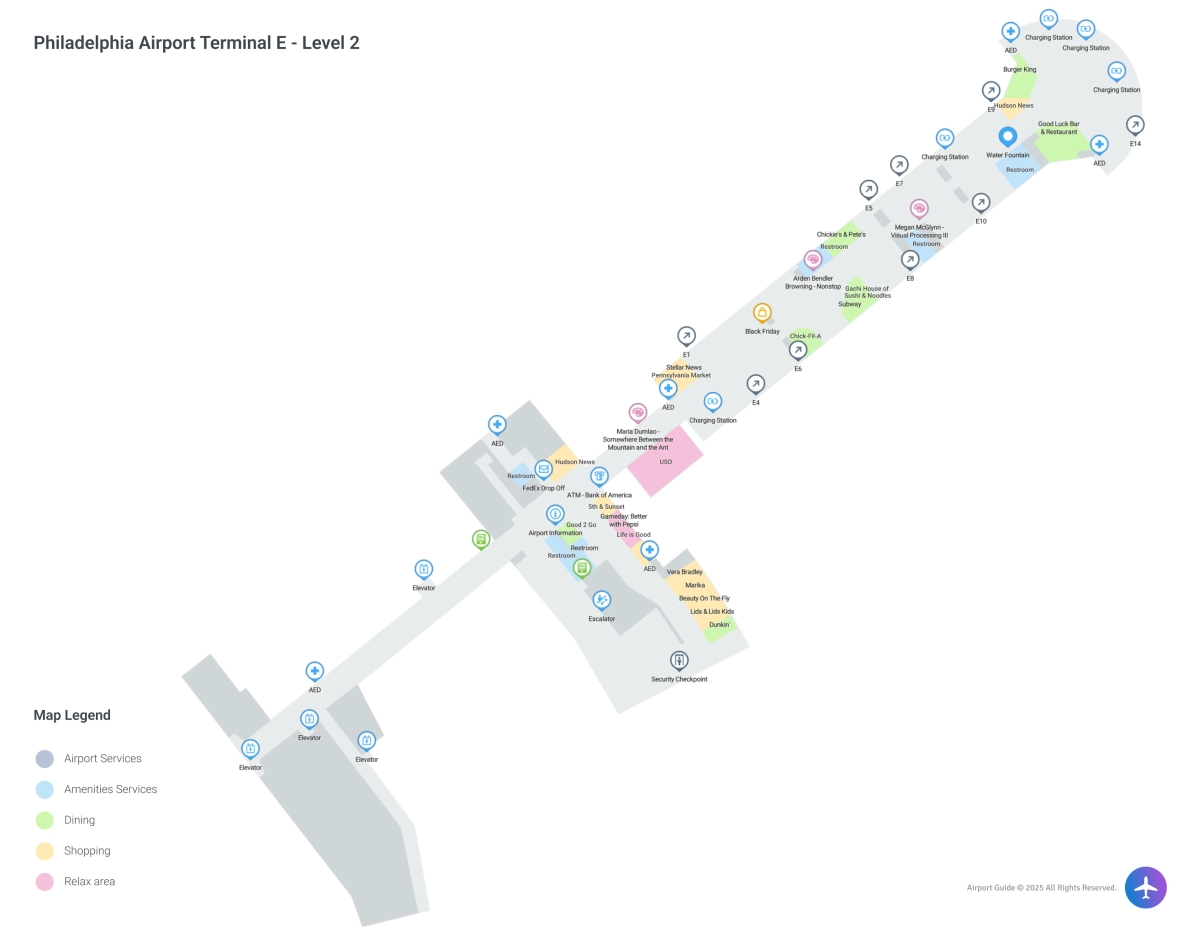
PHL | Terminal E | Level 2 | Interactive map
PHL | Terminal E | Level 2 | Printable map
Zoom In
PHL | Terminal E | Level 3 | Interactive map
PHL | Terminal E | Level 3 | Printable map
Zoom In

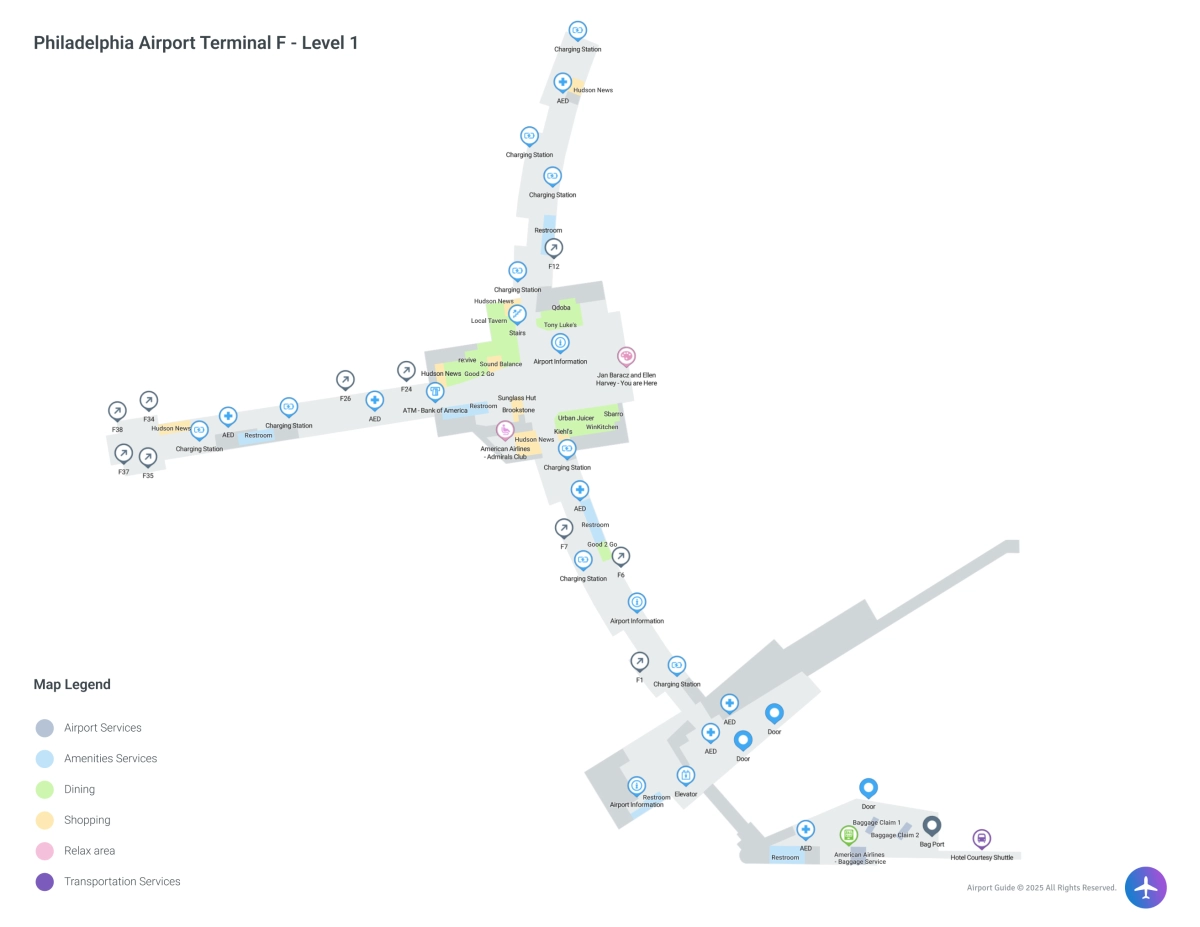
PHL | Terminal F | Level 1 | Interactive map
PHL | Terminal F | Level 1 | Printable map
Zoom In
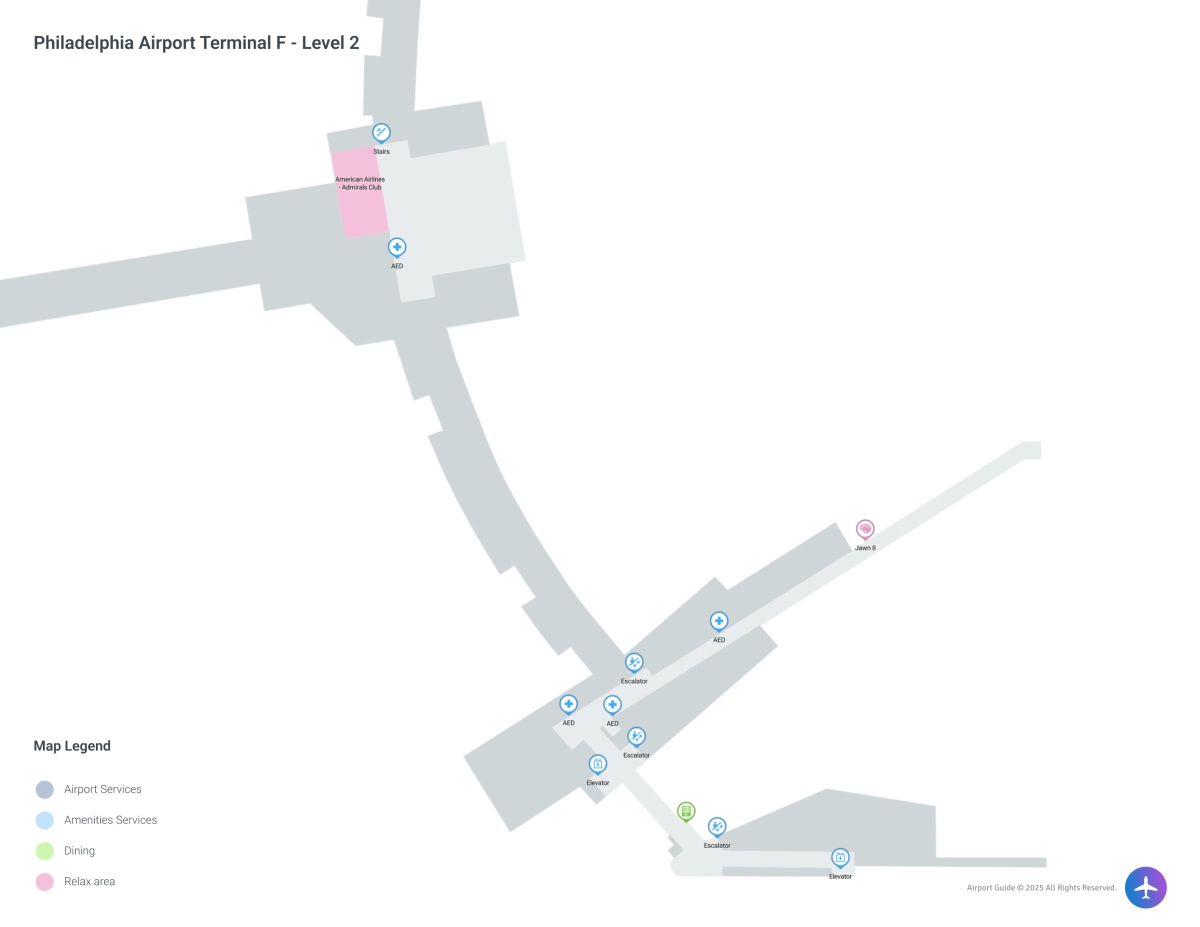
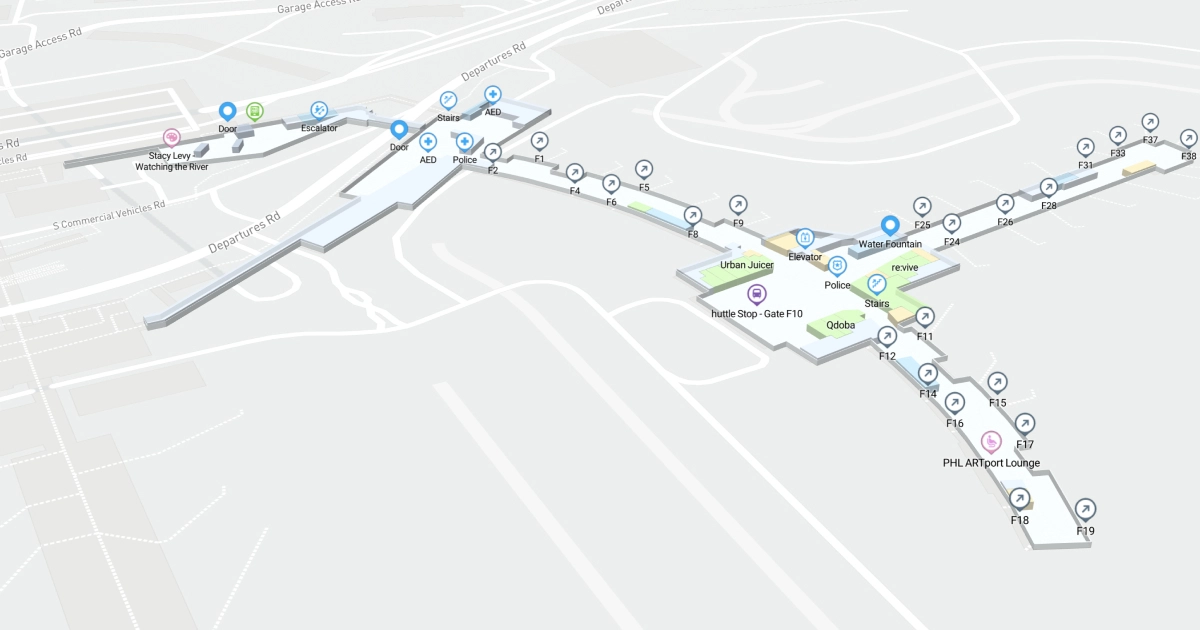
PHL | Terminal F | Level 2 | Interactive map
PHL | Terminal F | Level 2 | Printable map
Zoom In